VintageWatercooleds.com Technotes

Page last Modified:

Wednesday, February 15, 2006 12:51:43 PM - Views


VintageWatercooleds.com Technotes :: Seats

QuickLaunch

[Seat Types Chart] [Installing Front Seats]
[Repairing the Cable]

Seat Types Chart
I'm trying to get a database of all seats we can use in our cars. So far I don't have that many... Post some more!

Name What Car is it From? Picture
Mk1 GTI Seats Mk1 83-84 GTIs - Red interior
Mk1 Vinyl Seats A1 Rabbits before 80
Mk2 Jetta cloth seats Late Mk2 Jetta - Blue interior
Trophy Recaros 87-89 Jetta GLI 16v
Recaros Mk2 GTi, Jetta GLI
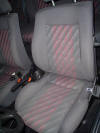
Red "Sport" Seats Mk2 GTI 8v
Corrado Leather Seats Corrados with Leather
Corrado Seats Corrados with automatic belts
Seats that require Modification to fit right (Mk3 seats in Mk1 or Mk2)
Mk3 seat rails are spaced farther apart, but that is the only difference. All of the extra width is in the inside rail "arms". This lead to a problem in Mk3 cars of the "arms" breaking there because of the extra length. To make them fit in a Mk1 or Mk2, you need to cut the outer arms and weld them shorter, to the correct width of the tracks of mk1 and mk2 seats. But it CAN be done!
Mk3 GL Seats 1993-1999 Mk3 Jetta GL, Golf GL
Mk3 Leather 1993-1999 Mk3 cars

Help me complete this chart! Post your seats      Back to Top


Removing and Installing Front Seats

Push the seat forward, and remove this plastic rail cover by lifting the large end upwards and sliding it out from position.
Push the seat back, loosen and remove the bolt shown here... then push the seat all the way back unto the rails, remove the seat (if doing the driver side remember you might have the seatbelt plug still connected under it, unplug that first before removing it.
What's this picture? it's the cleaning picture of course! You got the seats out. Get the Shop Vac and clean that area thoroughly.
Using General grease with a paint brush, Grease the rails... this will make your seats happy.
the front part needs grease in 2 places in the "crack" where the rail slides into and this shaft also needs some, it will make lifting and releasing the displacement arm a lot easier.
Before putting your seat back unto its rails, put a dab of grease on those rail guides.. it will make the re-install part easier. push the seat forward, line the rails properly, and bolt it back in place... your done!

Back to Top

Repairing the front Seat Cable
Can't lean the seat forward to get in the back? Your cables are snapped. It happens to almost every car as old as ours.

The driver seat I just bought were impeccable, except the snap cable syndrome was apparent. Here I have someone pull the rear bolster as I gently un-clamp the metal teeth that hold the rear vinyl of the seat.
This picture shows the seat coming apart from the teeth, slowly pull the edge over the teeth and it should come off easily. Don't break any of the teeth - you need them to close it back!
After looking into the seat the culprit was easily found (there are only 2 cables back there. the cable was snapped) now to replace it...
I opened up an old seat and found that it had the opposite cable snapped (always works that way don't it?) and this shows one end of it , simply remove the cable and transplant it into your seat.
This picture shows the replacement cable installed, showing where it should be passing through and how it hooks unto the C clamp. Close the seat up and you're done !
Back to Top

Talk about this technote on the VWC Forums


[Back to Top] [Index] [VWC Forums] [Contact/Donate]